Whenever you install an app, you'll see a list of the permissions that it requires. People often don't bother reading this, but the apps you install can request access to your contacts, messages and even your location, among other things. If you're concerned about your privacy, you should be aware of which apps can keep track of where you are. Read on to find out how to stop apps from accessing your location.
It's totally reasonable that you would rather keep information about your location to yourself. On the other hand, it makes sense to grant some apps access to it - navigation tools, for instance, but there are plenty of the others that you might want to forbid from accessing this information.
There are two ways you can go about this: either by using Android's built-in settings or using a dedicated permission control app.
Jump to section:
For Android 9.0
For all applications
For individual apps
For Android 6.0 to 8.0
For all applications
For individual apps
For Android 4.3 - 5.1
For all applications
For individual apps
For Android 9.0 Pie
For all applications
In Android Pie, things have changed a little in terms of the options you have to tweak the location accuracy. The Mode options (see below) has been removed and location accuracy is now a binary on/off option. On, means that WiFi+, mobile networks, and GPS are used in conjunction with GPS. This is similar to what used to be called High accuracy. Off mean you'll only be using GPS to track your location. This setting was previously called Device only.
 Location settings are a bit different on Android Pie, but still easy to understand. / © AndroidPIT
For individual applications
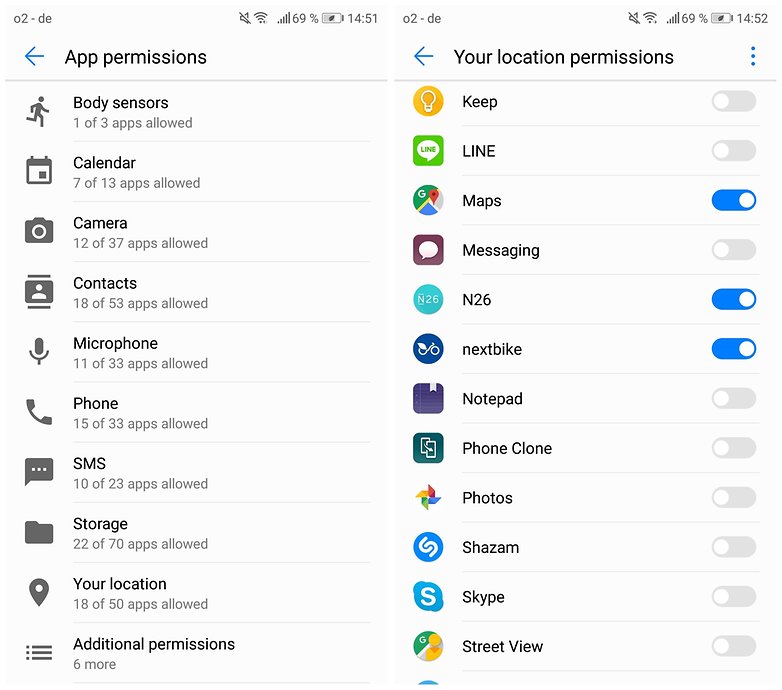
The way you toggle which individual apps have permission to track your location works in much the same way on Android 9 Pie as it did on Oreo. Simply head over to your main Settings menu and find the bit that's dedicated to app permissions. From there, hit Locationand you can toggle the tabs to allow or deny each app the access to your location data. Simple! You can also change permission for other things, such as which apps can use your camera.
 App permissions are the same on Pie as they were on Oreo. / © AndroidPIT
For Android 6.0 and up (Marshmallow to Oreo)
For all applications
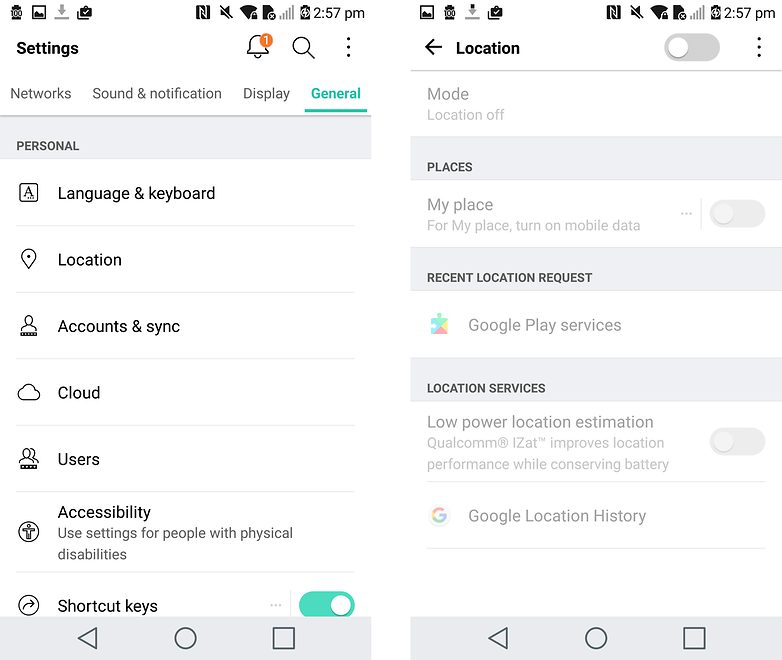
In the general section of your smartphone's Settings menu, you will find the Location settings option. Just tap the toggle switch at the top to activate or deactivate as you wish. You should be mindful of the fact that this option will disable every app's ability to see your location, even ones you might want to use GPS for, like Google Maps. If that's a problem for you, check out the next option.
 Your general Settings menu and Location options will look similar. / © AndroidPIT
You could also change the Location mode to one of three options, to customize things even further:
High accuracy uses all of the options, which include GPS, Wi-Fi, Bluetooth and mobile networks.
Battery saving uses Wi-Fi, Bluetooth and mobile networks, but not GPS.
Device only uses only GPS, not Wi-Fi, Bluetooth or mobile networks.
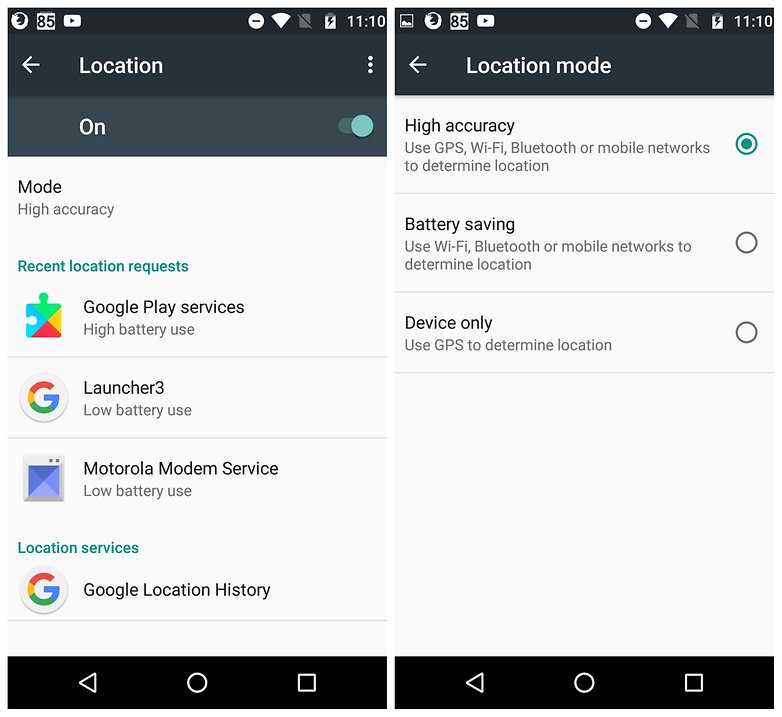 Ensure 'High accuracy' mode is toggled on for a good signal. / © AndroidPIT
For individual applications
Go to Settings>Apps>Configure apps or App settings, then App permissions. Then you will see a list of sensitive features of your phone (like the microphone, camera or your contacts list). Here you can select which apps have access to each, including Your location.
 Here, you can easily see which apps have permission and which do not. / © AndroidPIT
Tap Your location to select which apps you want to have permission to access your device's physical location. For apps like Google Maps or the Google App, it might be helpful to give them permission to access your location for convenience. But other apps might not be from a trusted source, or they may not even need your location. In that case, turn off location permission for these apps.
For Android 4.3 - 5.1
For all applications
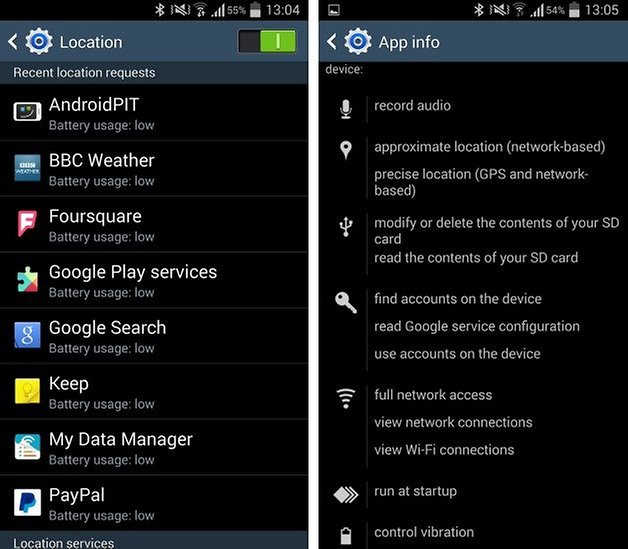
Just like in newer versions of Android, you can change the Location settings for all applications with a single toggle switch. Head to Settings > More > Permission and tap the on/off toggle switch next to Location. When the switch is in the off position, your handset will stop collecting location data.
You can also change the method of location reporting that is used. Tap Location > Mode. You can then choose between three different modes according to your preferences (as shown in the image below).
 Your phone can use a variety of methods to determine your location. / © AndroidPIT
If you scroll down through Location, you can see a list of all of the apps that have requested information about your location (see image below). You can then investigate the settings for individual apps to see if there is a way to disable location tracking.
 Opinion by Brittany McGhee
Waiting for system updates is the most annoying thing about using Android phones.
What do you think?
50
50
64 participants
Once your phone gets an update to Android Marshmallow or above you will have greater control over individual app permissions through the system settings.
Will your device get Android Oreo? Check out our list of scheduled updates.
 You can easily see which your installed apps are tracking your location. / © AndroidPIT
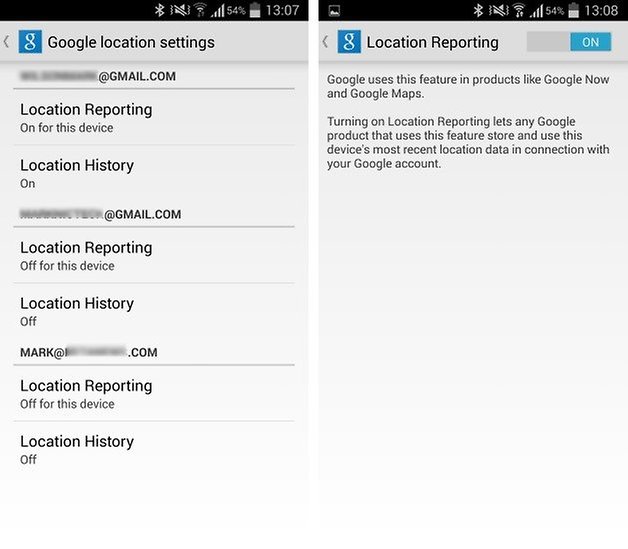
As well as the apps you have installed, numerous Google services – such as Google Now – can make use of your location. This is something else you can control. Beneath the list of apps, tap Google Location Reporting and you'll see a list of all of the accounts you have set up on your handset.
 In addition to apps, your location can also be tracked by various Google services. / © AndroidPIT
For each account, you can use the Location Reporting setting to allow or deny access to your location data, while the Location History section gives you the chance to wipe out data that has already been recorded.
For individual applications
While it is possible to disable location tracking on these older versions of Android, it is an all-or-nothing approach. However, there are apps which can help you control individual location permissions on older devices. We recommend checking out GOTCHYA: Privacy Management. It is compatible with Android versions 4.1 and up and allows you to manage permissions seamlessly from one convenient app.
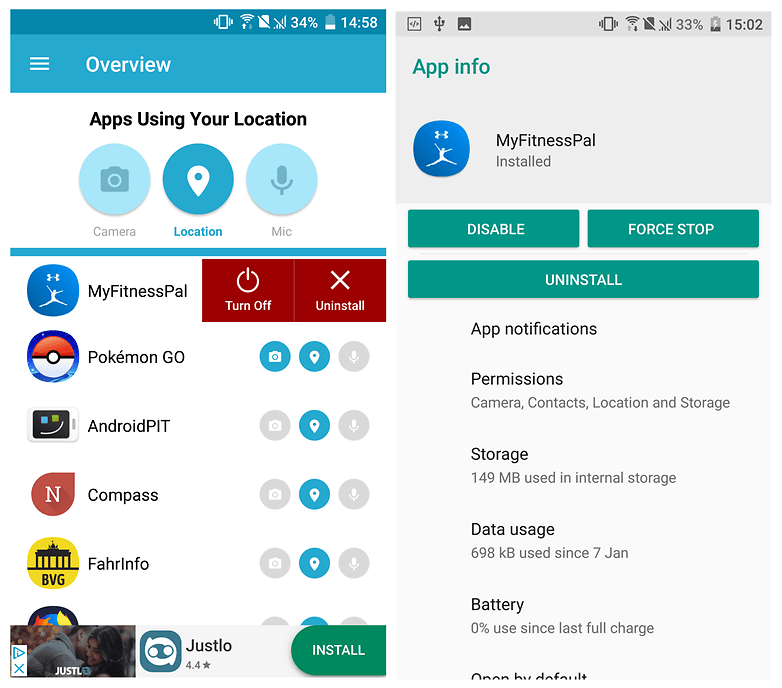 GOTCHYA has a clean and easy to use interface. / © AndroidPIT
Just open the application, tap the location icon in the middle and you will see a list of the apps that currently have location permissions. Found an app that you don't want to give access to? Swipe left and tap on Turn off. You will then be taken to the Settings where you can revoke the location permission.
GOTCHYA: Privacy Management

Do location tracking capabilities concern you, or are you happy to leave settings as they are? Have your say in the comments. Sponsor ads:
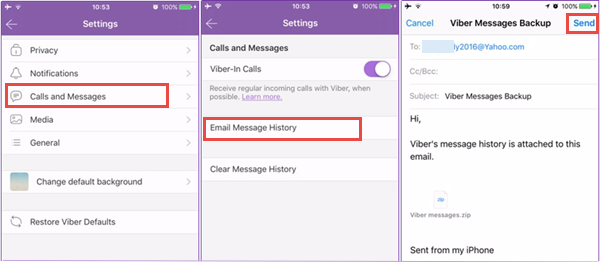
Gihosoft Free iPhone Data Recovery:https://www.gihosoft.com/iphone-data-recovery-free.html
Gihosoft iPhone Data Recovery Free
Free iPhone Data Recovery Software for Windows/Mac
Recover up to 12+ types of files, including contacts, SMS, photos, WhatsApp, Viber, notes, etc.
Restore lost data from iOS devices directly or from iTunes and iCloud backup
Recover iPhone data lost due to iOS upgrade/jailbreak, accidental deletion, device lost or broken
Support all the latest iPhone, iPad and iPod Touch
Both Free and Pro version.
If you lost data after you updated to a new iPhone, you can always use Gihosoft iPhone Data Recovery to get the data back from the old iPhone or backup. You may also like:iphonerecovery.com
If you use android phones, please choose Gihosoft Android Data Recovery.With Gihosoft Android Data Recovery, no longer afraid of data loss!
Must read:Youtube video downloader for pc
Gihosoft RePicvid Free Photo Recovery Software provides a free photo recovery software for windows to help users recover the deleted or lost photo for free.
Jihosoft Android Data Recovery: the best Android Data Recovery software for Windows and Mac to recover deleted contacts, messages, photos, videos, WhatsApp and etc from Android devices.Tips:How to transfer messages from iPhone to iPhone
Jihosoft File Recovery:Recover deleted, Lost, formatted, or corrupted files from PC, flash drive and memory card easily & safely
Also Read:Update Android
Also Read:Top 8 Best Alternative Websites to TamilGun in 2019
Also Read:Free Download FRP Bypass APK for Android 2019
Also Read:Best 10 Movie4k Alternative Websites for Movie Streaming 2019
Also Read:Top 32 Best Proxy and Mirror Sites to Unblock Fmovies 2019
Also Read:Best Torrent Search Engine Sites to Find Your Favorite Torrents 2019
Also Read:5 Best Sites Serving as Alternatives to TheWatchSeries Online 2019
Also Read:Top 6 Best Alternative Websites to Torlock For You 2019
Also Read:Download Latest Samsung USB Drivers for Mobile Phones on Windows
Also Read:take a screenshot on any Android phone
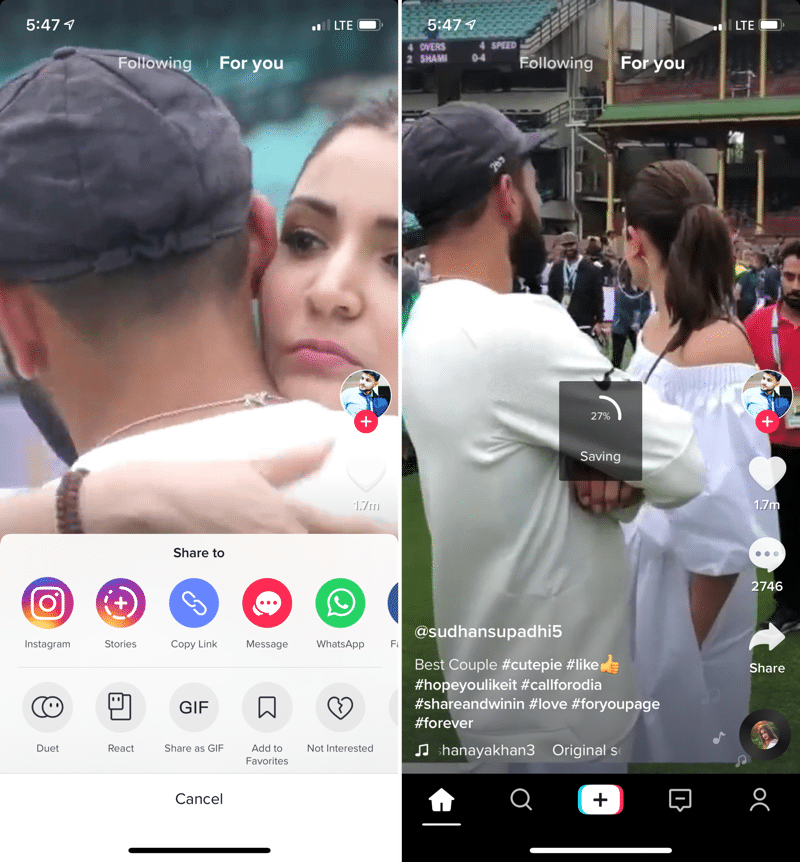
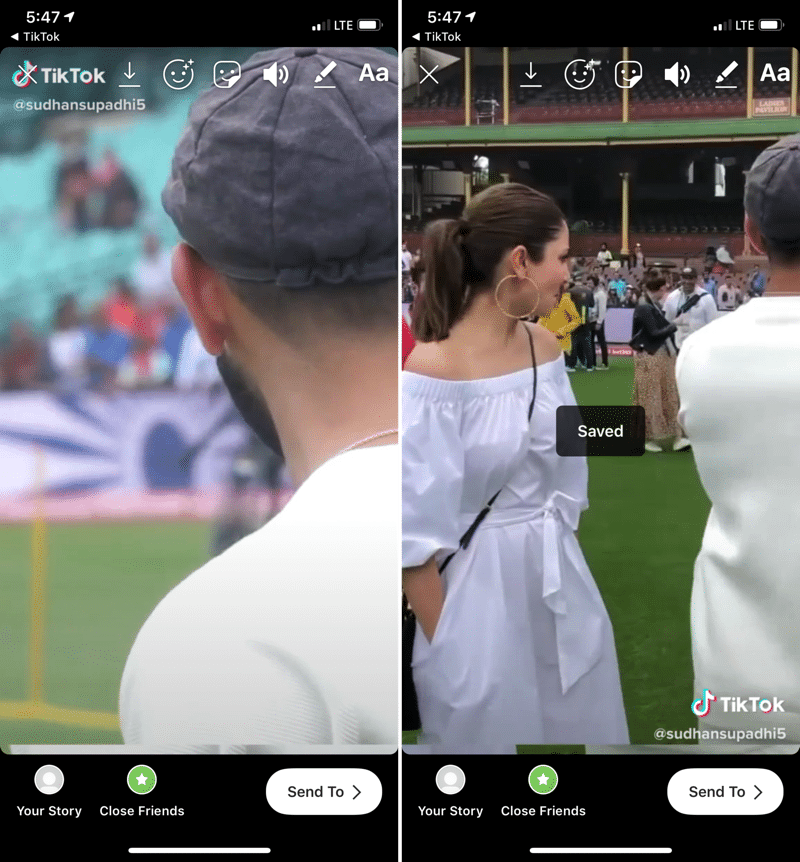
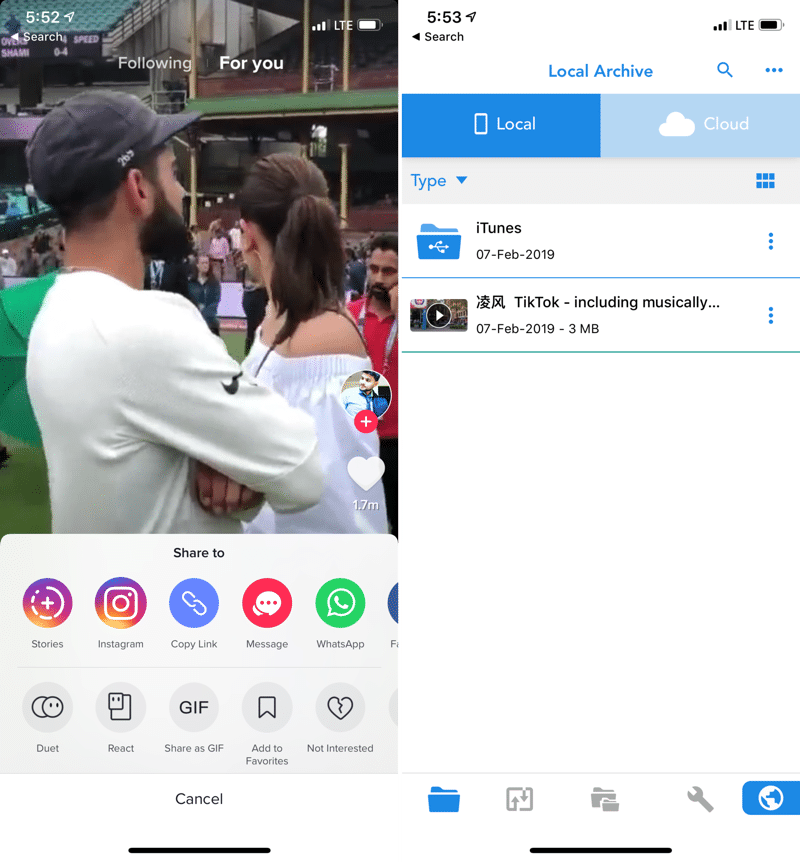
Also Read:Convert Video to GIF Free with Top 5 Free Video to GIF Converters
Also Read:Add Timestamp to Photos on Windows/Mac/Android/iPhone